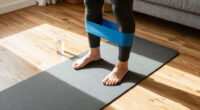
Use resistance bands to complete a balanced strength workout at home, even if you have limited space or no weight equipment. This beginner guide shows you how to check your bands, set up a safe workout area, choose resistance, perform a full-body routine, and adjust the difficulty. Allow about 30-40 minutes for your first session, including setup and a short warm-up.

Get workout gear delivered free with Prime
- Fast, free delivery on millions of items
- Prime Video, Amazon Music and more included
- Member-only deals all year

WHATAFIT Resistance Bands with Handles, Exercise Bands Set for Working Out
- ✔ Brand: WHATAFIT
- ✔ Model: WT-RBNew01
- ✔ Material: Natural latex

HPYGN Resistance Bands with Handles – 150 lb Exercise Bands for Home Workout
- ✔ Brand: HPYGN
- ✔ Material: Natural latex
- ✔ Band count: 5

WSAKOUE Pull Up Bands, Resistance Bands Set for Men & Women
- ✔ Brand: WSAKOUE
- ✔ Model: WLKM2-2
- ✔ Material: Natural Malaysia latex
Difficulty: Beginner | Time: 30-40 minutes
What You’ll Need
Tools & Materials:
- A light and a medium resistance band; loop bands or long handled bands both work
- A stable chair or bench for support, if needed
- Comfortable workout clothes and enough clear floor space to move
- Water and a timer or clock
Knowledge:
- Basic familiarity with squats, hinges at the hips, and controlled arm movements
- Ability to stop an exercise if it causes sharp pain, numbness, or dizziness
Check each band for cracks, thinning, sticky patches, tears, or damaged handles before use. Replace a damaged band. If you have a current injury, significant joint pain, or a medical condition that affects exercise, ask a qualified health professional which movements are suitable for you. Keep bands away from sharp edges, heat, and direct sunlight.
WHATAFIT Resistance Bands with Handles, Exercise Bands Set for Working Out
For a home setup that needs to cover several kinds of exercise, WHATAFIT is our most adaptable pick. Its five tubes are rated from 10 to 50 lb each and can be combined for a stated maximum of 150 lb. That lets us make smaller changes between movements than we can with the five preset loop bands from WSAKOUE, and the handles make pressing, rowing and curls more familiar to people accustomed to gym cables.The package goes beyond the basic tube-and-handle format: ankle straps, a door anchor and a carry bag are included. Ankle straps open up lower-body movements, while the anchor can create a fixed pulling point for rows or presses in a room without a dedicated workout station. That makes this set a stronger all-round choice than HPYGN for buyers who want attachments ready for varied sessions. The tradeoff is that an anchored workout depends on a solid, fully latched door, with the anchor placed on the hinge side. These bands are also natural latex, which rules them out for users with latex allergies.WHATAFIT makes the most sense when we want one portable kit to handle a range of home exercises and expect to adjust resistance over time. Buyers focused mainly on assisted pull-ups may find WSAKOUE’s loop bands simpler, while those who do not need ankle straps can compare HPYGN’s grip and buckle details instead.
Pros:
- Five stackable tubes provide individual ratings from 10 to 50 lb and a stated combined maximum of 150 lb.
- Handles, ankle straps and a door anchor support a wider range of exercises than a basic loop-band set.
- Carry bag makes the kit easier to store or take along.
- Dual-layer natural latex tubes and reinforced fittings are specified for durability.
Cons:
- Natural latex is unsuitable for people with latex allergies.
- The door anchor requires a solid, fully latched door and must sit on the hinge side.
Best for: Home exercisers who want a portable, handle-based kit for upper-body, lower-body and core movements, with resistance that can be combined as strength improves.
Not ideal for: People with latex allergies, anyone without a suitable door for anchoring, or buyers who mainly want loop bands for pull-up assistance.
Bottom line: Choose WHATAFIT when a broad attachment set and stackable tube resistance matter more than the simplicity of pull-up loops.
“Choose WHATAFIT when a broad attachment set and stackable tube resistance matter more than the simplicity of pull-up loops.”
HPYGN Resistance Bands with Handles – 150 lb Exercise Bands for Home Workout
HPYGN is the closest alternative to WHATAFIT: both are five-tube systems with individual 10–50 lb ratings, stackable resistance up to a stated 150 lb, handles and a door anchor. That makes them more alike than different in their core use. HPYGN’s distinguishing details are its steel buckles and non-slip cushioned grips, which may appeal to buyers who prioritize a secure-feeling handle during repeated presses and rows.For home workouts, this format is useful when we want to vary resistance without changing machines or storing weights. The travel bag keeps the pieces together, and the anchor allows movements that need a fixed point. Compared with WHATAFIT, however, the listed HPYGN package does not include ankle straps, so it offers fewer specified attachment options for lower-body work. Compared with WSAKOUE’s continuous loops, it is more suited to cable-like handle exercises but brings extra parts and relies on having an appropriate door for anchoring.We would choose HPYGN for a straightforward handle-based routine where grip and buckle construction are priorities. It is a weaker fit for anyone seeking a distinctly different format from WHATAFIT, since the resistance ranges and main accessories overlap substantially. Like the other two picks, it is made from natural latex, so latex sensitivity is a reason to skip it.
Pros:
- Five stackable bands cover individual ratings from 10 to 50 lb, with up to 150 lb stated in combination.
- Steel buckles and cushioned non-slip handles are specified for a secure, comfortable grip.
- Door anchor supports anchored movements in a home workout area.
- Travel bag helps keep the set together between sessions.
Cons:
- Natural latex can cause reactions for users with latex sensitivity.
- The listed package does not include ankle straps, unlike WHATAFIT’s set.
Best for: People who want a stackable tube kit for home strength sessions and value the listed steel buckles and cushioned, non-slip grips.
Not ideal for: Buyers who need ankle straps included, latex-sensitive users, or anyone whose home has no suitable door for the anchor.
Bottom line: HPYGN suits buyers who want the familiar stackable tube format and put its listed grip and buckle features ahead of extra attachments.
“HPYGN suits buyers who want the familiar stackable tube format and put its listed grip and buckle features ahead of extra attachments.”
WSAKOUE Pull Up Bands, Resistance Bands Set for Men & Women
WSAKOUE takes a different approach from the two handle kits: it supplies five continuous loop bands with a stated resistance range of 5–125 lb, plus a storage bag and instruction manual. This shape is especially useful for assisted pull-ups, stretching and bodyweight movements where a loop can support or add resistance. It packs more simply than WHATAFIT or HPYGN because there are no separate handles, ankle straps or door anchor to organize.The format also comes with clear limits. The five levels are preset, so the change between them may feel less gradual than combining individual tubes in the WHATAFIT and HPYGN sets. And while the broad stated range can serve beginners through advanced users across different movements, its figures should not be treated as directly equivalent to the tube kits’ ratings: these are different band styles used in different ways. For cable-like rows or presses with handles, WHATAFIT and HPYGN are the more natural choices.We would pick WSAKOUE when pull-up assistance, mobility work or a compact kit is central to the routine. Its natural Malaysia latex construction may be described as soft and elastic, but it remains latex; people with latex allergies should avoid it. Advanced trainees who need many small progression steps may also prefer a system with more adjustment options than five preset loops.
Pros:
- Loop format works well for assisted pull-ups and bodyweight movements.
- Five bands offer a stated resistance range of 5–125 lb.
- Storage bag and instruction manual are included.
- Compact set avoids the separate attachments included with the tube kits.
Cons:
- Five preset levels may not provide enough adjustment steps for some advanced training plans.
- No handles, ankle straps or door anchor are listed, limiting cable-style exercise options.
- Natural latex is unsuitable for people with latex allergies.
Best for: People training assisted pull-ups, stretching, bodyweight exercises or general resistance work who want a compact set of loop bands.
Not ideal for: Users who want handles and a door anchor for cable-style exercises, need closely spaced resistance adjustments, or have a latex allergy.
Bottom line: WSAKOUE is the compact choice when loop-band exercises and pull-up assistance matter more than handle-based versatility.
“WSAKOUE is the compact choice when loop-band exercises and pull-up assistance matter more than handle-based versatility.”
As an Amazon Associate we earn from qualifying purchases.
Before You Start
Choose a clear area where the band cannot catch on furniture or objects. For any exercise that anchors a band to a door or post, use an anchor designed for exercise bands and follow its instructions; do not rely on a loose handle or an improvised sharp-edged anchor. Keep the band away from your face, and do not stretch it beyond the maker’s stated limit. Start with light resistance: the final repetitions should feel challenging while you can still move smoothly and keep good form. Rest 45-90 seconds between sets, or longer if your breathing has not settled.
Step-by-Step Instructions
Step 1: Inspect your bands and clear the workout area
Lay out the bands and examine their full length, including seams, handles, and attachment points. Set aside any band with visible damage. Move rugs, cables, pets, and furniture out of your movement path. If you plan to anchor a band, install a purpose-made anchor exactly as directed and test it with gentle tension before stepping away from it.
Tip:Latex bands can degrade with age, heat, and sunlight. Store them dry and out of direct sun after your workout.
Check: The bands are intact, the floor is clear, and any anchor stays firmly in place under gentle tension.
Step 2: Warm up for five minutes
Walk in place or march gently for two minutes. Then do eight slow bodyweight squats, eight hip hinges, eight arm circles in each direction, and several easy shoulder blade squeezes. Move through a comfortable range without bouncing. This prepares your joints and lets you notice stiffness before adding resistance.
Tip:Keep the warm-up easy. It should raise your body temperature without making you tired.
Check: You feel warmer and can move your hips and shoulders comfortably through the ranges you plan to use.
Step 3: Choose a manageable resistance
Begin with the light band for your first set. Hold or step on the band so there is slight tension at the start of each movement, while leaving enough slack to move smoothly. Complete a few test repetitions. If you can move without control or feel no effort, shorten your grip slightly or switch to the next band strength. If you have to jerk, hold your breath, or change your posture, reduce the tension.
Tip:Band colors do not follow a universal resistance scale. Check the package or manufacturer’s guide instead of comparing colors across brands.
Check: You can complete the test repetitions slowly and steadily, with the last few feeling harder than the first.
Step 4: Perform a band squat
Stand on the middle of a long band with feet about shoulder-width apart. Hold one end in each hand at shoulder height, or use a loop band above your knees for a bodyweight squat variation. Brace your abdomen, send your hips back, and bend your knees to a comfortable depth. Keep your knees tracking in line with your toes. Press through your feet to stand. Complete 2 sets of 8-12 repetitions, resting between sets.
Tip:Keep both feet planted and the band flat under your shoes. Stop at a depth where your heels stay down and your back remains comfortable.
Check: Your repetitions are controlled, your knees follow the direction of your toes, and you feel your legs and hips doing the work.
Step 5: Perform a band row
Sit on the floor with legs extended, or sit upright in a sturdy chair. Place a long band around the middle of both feet and hold an end in each hand. Check that the band cannot slip off your shoes. Sit tall, gently draw your shoulder blades back, then pull your hands toward your lower ribs with elbows close to your sides. Return your hands slowly until your arms are extended without rounding your back. Complete 2 sets of 8-12 repetitions.
Tip:Keep your shoulders relaxed away from your ears. Use less tension if the band pulls you forward or makes you lean back to finish.
Check: You feel the muscles around your upper back working, and the band stays securely around your feet throughout the set.
Step 6: Perform a chest press
For a no-anchor option, sit tall and wrap a long band behind your upper back, under your shoulder blades. Hold an end in each hand near your chest. Press your hands forward until your arms are nearly straight, then return slowly. Keep your wrists straight and your ribs stacked over your hips. Complete 2 sets of 8-12 repetitions. If you use a door anchor instead, place it at chest height, close and secure the door as directed, then stand facing away and test light tension before beginning.
Tip:Do not let your shoulders roll forward at the end of the press. Reduce tension if you cannot return the band slowly.
Check: Your hands move forward and back under control without shoulder discomfort or a sudden band recoil.
Step 7: Perform a hip hinge
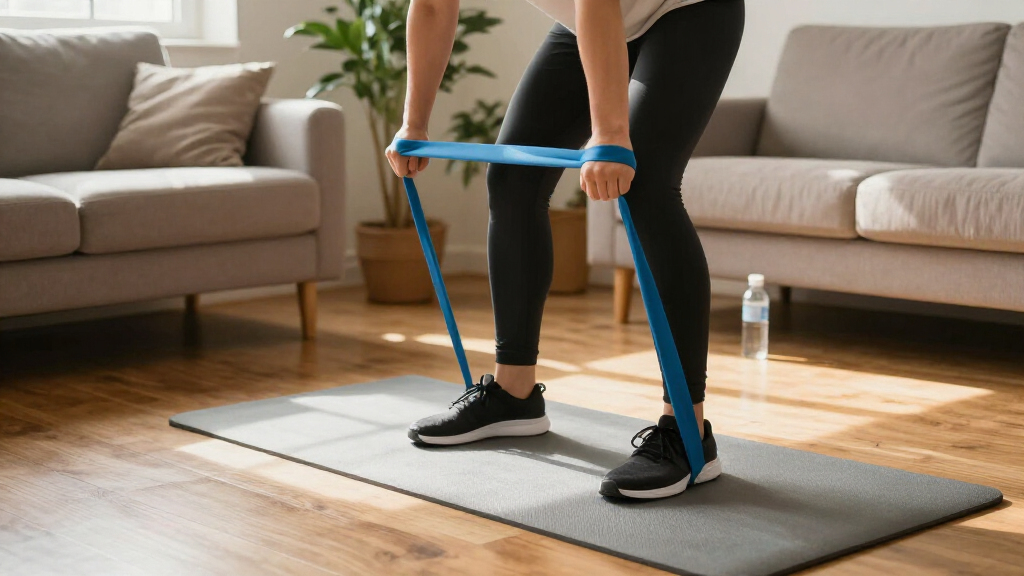
Stand on the middle of the long band with feet hip-width apart. Hold the ends in front of your thighs with a small amount of tension. Soften your knees, push your hips back, and tip your torso forward while keeping your back neutral. Stop when you feel a stretch in the backs of your legs, then press your feet into the floor and bring your hips forward to stand. Complete 2 sets of 8-12 repetitions.
Tip:Think of moving your hips back rather than squatting down. Keep the band close to your legs and avoid rounding your lower back.
Check: You feel your hips and the backs of your thighs working, with no pinching in your lower back.
Step 8: Perform a standing band press
Stand on the center of the band with one or both feet, holding the ends at shoulder level. Press your hands upward only as far as your shoulders move comfortably, then lower slowly to the starting position. Keep your abdomen gently braced and avoid arching your back. Complete 2 sets of 8-10 repetitions. If overhead motion is uncomfortable, skip this movement and repeat the row or chest press with light resistance.
Tip:Use a lighter band than you used for squats. Shoulder movements often need less resistance.
Check: Your trunk stays steady and the movement feels smooth, without pain or a strong urge to arch your back.
Step 9: Cool down and record your session
Walk slowly for two minutes, then gently stretch your chest, hips, and thighs without forcing the range. Note the band strength, grip length, exercises, sets, and repetitions you completed. Stop stretching if it causes pain. Give your muscles time to recover before repeating a hard session; many beginners start with two sessions a week on nonconsecutive days.
Tip:Muscle effort or mild next-day soreness can occur. Sharp pain, numbness, or worsening joint pain is a signal to stop and reassess.
Check: Your breathing settles, you have recorded the workout, and no exercise caused sharp pain or loss of control.
Common Mistakes to Avoid
- Starting with a band that is too strong. — Test a light band first. Choose tension that allows slow repetitions and a steady return; reduce it if you jerk or change posture.
- Letting a band slip from under the feet or off the shoes. — Position the band securely under the middle of both feet, wear shoes when appropriate, and check placement before each set.
- Rushing repetitions or letting the band snap back. — Move smoothly in both directions and keep tension under control as you return to the starting position.
- Anchoring a band to an unstable or sharp object. — Use a purpose-made anchor according to its instructions, or choose an exercise that does not need an anchor.
Troubleshooting
Problem: The band feels too easy even at the end of the set.
Solution: Shorten your grip a small amount, step farther from a secure anchor, or choose the next resistance level. Change one adjustment at a time and retest your form.
Problem: You cannot complete the repetitions without leaning or jerking.
Solution: Use a lighter band or hold it with more slack. Reduce the repetition target until you can move steadily.
Problem: The band slides on the floor or around your feet.
Solution: Pause, reposition it flat beneath the middle of your shoes, and confirm it is not twisted. Choose a stable seated variation if it continues to slip.
Problem: A movement causes sharp pain, tingling, or numbness.
Solution: Stop that movement immediately and release the band carefully. Do not test it again through pain; seek professional advice if symptoms persist or recur.
What Success Looks Like
A successful session includes a warm-up, controlled work for your legs, hips, chest, shoulders, and back, and a calm finish. You should be able to complete the planned repetitions without band slippage, breath holding, jerking, or sharp pain. The last repetitions may feel challenging, but your posture and control should remain consistent. A written record gives you a clear starting point for your next session.
Next Steps
Repeat the workout twice weekly with at least a day between sessions while you learn the movements. When you can complete the top of a repetition range with steady form in every set, increase resistance slightly or shorten your grip a small amount. Do not increase both at once. Recheck bands before each use and replace damaged ones. Add a third weekly session only if you recover well and your form stays consistent; ask a qualified trainer or health professional for help adapting movements around an injury or persistent discomfort.
Frequently Asked Questions
How many resistance band exercises should a beginner do?
Start with four to six movements that cover the major muscle groups. This guide uses six. Two sets per movement are enough for a first session; adjust the number of exercises if you are new to strength training or short on time.
How often should I use resistance bands?
Begin with two full-body sessions a week on nonconsecutive days. Allow recovery between challenging sessions, and adjust the schedule if soreness affects your normal movement.
How do I know which band strength to use?
Choose a band that makes the last few repetitions challenging while allowing smooth movement and stable posture. Use a lighter band if you need to jerk, lean, or hold your breath.
Can resistance bands replace dumbbells?
Bands can provide resistance for many strength exercises and are useful for home workouts. Their tension changes through the movement, so they feel different from dumbbells. Pick exercises and resistance that let you move with control.
What should I do if I feel pain during an exercise?
Stop and release the band carefully if you feel sharp pain, tingling, numbness, or sudden joint discomfort. Do not continue through those symptoms. Seek professional advice if they persist or return.