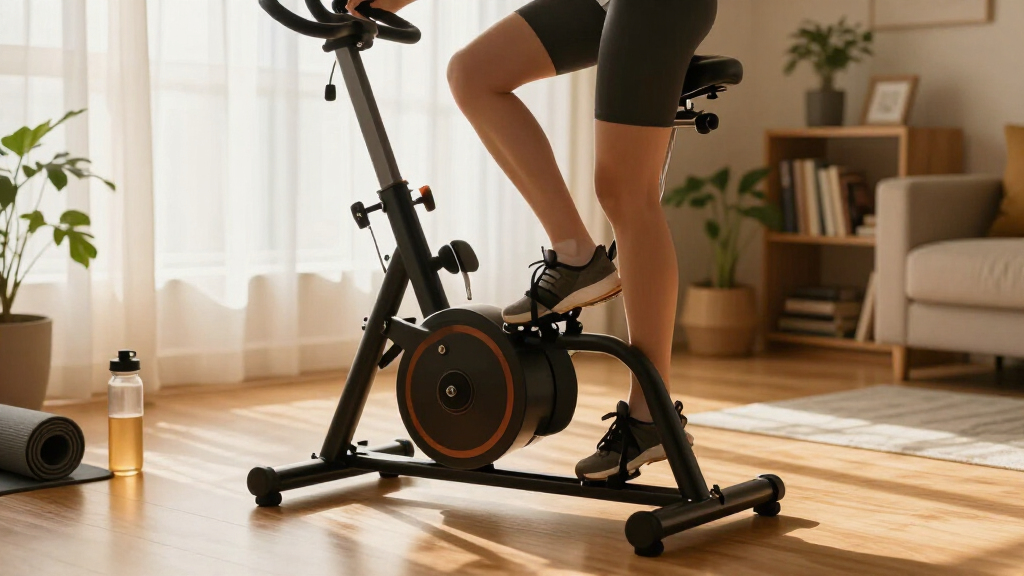

This guide walks you through the complete process of assembling, adjusting, riding, and folding away a compact folding exercise bike. By the end, you will have a fully functional bike correctly fitted to your body, positioned safely in your home, and ready for regular workouts — plus the ability to fold and store it in under a minute when you are finished exercising. This guide is written for beginners with no prior experience assembling fitness equipment. You do not need mechanical skills, but you do need about an hour of uninterrupted time for assembly and a clear floor space roughly 2 feet by 4 feet where the bike will be used and stored.

Get workout gear delivered free — and shop member deals
- Fast, free delivery on millions of items
- Access to Prime Big Deal Days deals on October 6–7
- Prime Video, Amazon Music and more included

BARWING 5-in-1 Foldable Stationary Exercise Bike with 16-Level Magnetic Resistance
- ✔ Resistance: 16-level magnetic
- ✔ Flywheel Weight: 5.5 lbs
- ✔ Weight Capacity: 330 lbs
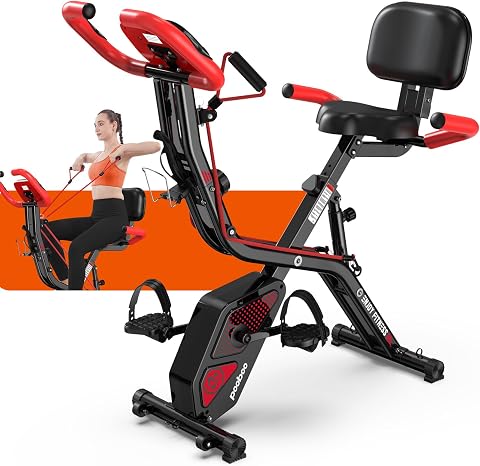
pooboo Folding Magnetic X-Bike Upright Exercise Bike for Home Gym
- ✔ Resistance: Magnetic, 8 levels
- ✔ Weight Capacity: 300 lbs
- ✔ Rider Height: 4’10"–6’1"

USLIM 817 Foldable Exercise Bike with 16-Level Magnetic Resistance
- ✔ Resistance: 16-level magnetic
- ✔ Flywheel Weight: 6.6 lbs
- ✔ Max User Weight: 300 lbs
Compact folding exercise bikes come in two main styles: upright bikes with a folding frame or folding handlebar post, and under-desk mini bikes with foldable pedals. This guide covers the full-size folding upright bike, which is the most common type, and includes notes where under-desk models differ. Because assembly steps vary slightly between brands, keep your manufacturer’s manual nearby and treat this guide as the overall roadmap that fills in the gaps most manuals leave out: proper fit, safe placement, correct riding posture, and smooth folding.
Difficulty: Beginner | Time: 45-60 minutes for assembly, then 20-30 minutes for adjustment and first ride
What You’ll Need
Tools & Materials:
- The bike box and all included parts, unpacked and laid out on the floor
- Included assembly tools (typically an Allen wrench set and a combination wrench)
- A Phillips screwdriver (some models require one even if not included)
- A soft cloth or old towel for wiping parts and cleaning the frame
- A tape measure for checking clearance space
- A phone or timer for your first workout intervals
- Batteries for the console (usually AA or AAA, often not included)
Knowledge:
- Ability to follow basic assembly instructions and tighten bolts with a wrench
- Awareness of your own height and inseam length for seat adjustment
- Basic familiarity with any personal health limits relevant to cardiovascular exercise
Before assembly, open the box carefully and verify all parts against the parts list in the manual. Lay each part on a towel in a clear area so nothing is lost under furniture. Check the weight capacity printed in your manual — most compact folding bikes support 220 to 300 pounds. If any hardware is missing, contact the manufacturer before starting rather than substituting parts from a hardware store, since incorrect bolts can fail under riding loads.
If you have heart condition concerns, joint problems, or have been inactive for a long period, talk to a doctor before beginning a regular riding routine.
BARWING 5-in-1 Foldable Stationary Exercise Bike with 16-Level Magnetic Resistance
The BARWING takes our top spot because it solves the most common folding-bike frustrations at once. Its 16-level magnetic resistance gives you far finer control over workout intensity than the pooboo’s 8 levels, which means the bike keeps pace with you as your fitness improves rather than being outgrown. The eight-position seat adjustment and 4’11"–6’6" height range also make it the most accommodating bike here for shared households — the pooboo caps out at 6’1", which rules out taller riders entirely.Compared with the USLIM, the tradeoffs are subtler. The BARWING’s 330 lb weight capacity edges out both rivals (300 lbs each), and its console adds an odometer the USLIM skips. On the other hand, its 5.5 lb flywheel is lighter than the USLIM’s 6.6 lb, so the pedal stroke feels marginally less smooth at low cadence. One note of caution: the listed weight capacity differs between the product title and description, so we would treat the 330 lb figure as approximate rather than guaranteed. Assembly is required, though the bike arrives largely pre-assembled, keeping setup to a manageable afternoon job.
Pros:
- 16 resistance levels support everything from warm-up spins to harder intervals
- Widest rider fit of the group: 4’11" to 6’6" with 8 seat positions
- Folds flat quickly and rolls away on its reinforced steel frame
- LCD with odometer and a phone holder for guided workouts
Cons:
- Flywheel is lighter than the USLIM’s, so the stroke feels slightly less fluid
- Weight capacity is listed inconsistently between title and description
- Assembly required, even if most of it comes pre-done
Best for: Households with multiple riders of varying heights who want one bike that adapts to everyone
Not ideal for: Riders who want a guaranteed weight capacity and a heavy, gym-grade flywheel feel
Bottom line: The most balanced folding bike of the three, with the adjustability and resistance range to stay useful for years.
“The most balanced folding bike of the three, with the adjustability and resistance range to stay useful for years.”
pooboo Folding Magnetic X-Bike Upright Exercise Bike for Home Gym
What makes the pooboo stand out in this lineup is not raw performance — it is versatility per dollar. This is the only bike of the three offering a semi-recumbent mode, which matters enormously if you have back sensitivity, knee issues, or simply want a lower-intensity recovery option. Add the attachable arm resistance bands and you get a genuinely full-body workout from a machine that folds away, something neither the BARWING nor the USLIM attempts.The compromise is intensity. With 8 resistance levels instead of the 16 on the BARWING and USLIM, the pooboo will feel limiting to anyone building serious fitness, and the taller riders who fit the BARWING (up to 6’6") are capped at 6’1" here. The multi-function monitor is the most complete in the group — it includes heart rate tracking that the USLIM’s basic LCD omits — though the seat is a known weak point on longer rides, so riders planning sessions beyond 30–40 minutes may want a padded cover. For beginners, casual riders, and anyone who values workout variety over maximum resistance, this pick makes the most sense.
Pros:
- 4-in-1 design: upright, semi-recumbent, and arm resistance bands
- Folds fully with transport wheels for genuinely compact storage
- Heart rate monitoring on the console, unique in this lineup
- 300 lb capacity with an oversized adjustable seat
Cons:
- Only 8 resistance levels — the ceiling arrives quickly
- Seat comfort falls short on longer rides
- Shorter height ceiling than both competitors
Best for: Beginners and casual riders who want recumbent options and arm work without buying multiple machines
Not ideal for: Taller riders over 6’1" and anyone chasing high-resistance interval training
Bottom line: The most versatile folding bike for the money, as long as moderate intensity is enough for your goals.
“The most versatile folding bike for the money, as long as moderate intensity is enough for your goals.”
USLIM 817 Foldable Exercise Bike with 16-Level Magnetic Resistance
If your priority is a smooth, silent pedal stroke in a no-frills package, the USLIM 817 is the strongest argument here. Its 6.6 lb flywheel is the heaviest of the three, and that extra mass translates into a more consistent, fluid resistance feel than the lighter BARWING — particularly noticeable during steady-state rides while watching TV or working. At under 20 dB, it is engineered to disappear acoustically in an apartment or shared bedroom.Where it trails the competition is polish. The LCD tracks only time, speed, and calories — no distance or odometer like the BARWING, no heart rate like the pooboo — so data-driven riders will find it thin. It shares the pooboo’s 300 lb capacity, sitting below the BARWING’s rating, though it does match the BARWING’s generous 4’11"–6’6" height range, unlike the pooboo. Setup is straightforward since it arrives roughly 70% pre-assembled, putting it on par with the BARWING for out-of-box convenience. This model is better suited to riders who know exactly what they want — quiet cardio — and do not need the multi-mode tricks of the pooboo or the fuller console of the BARWING.
Pros:
- Heaviest flywheel of the group for a smoother, more consistent ride
- Extremely quiet operation under 20 dB
- Fits riders from 4’11" to 6’6"
- Arrives 70% pre-assembled with transport wheels
Cons:
- Basic LCD with only time, speed, and calories
- 300 lb capacity trails the BARWING
- Some assembly still required
Best for: Apartment dwellers and early-morning riders who prioritize a silent, smooth pedal stroke
Not ideal for: Riders who want detailed workout data or a recumbent option
Bottom line: The quietest, smoothest-riding option here, ideal for riders who value serenity over features.
“The quietest, smoothest-riding option here, ideal for riders who value serenity over features.”
As an Amazon Associate we earn from qualifying purchases.
Before You Start
Choose your location before assembling anything. You need a flat, hard floor — concrete, tile, hardwood, or thin carpet. Thick carpet can make the bike rock during use, so if your only option is plush carpet, plan to place a plywood sheet or rubber mat (at least 3 feet by 5 feet) under the bike. Position the bike away from doorways and walk paths, and leave at least 2 feet of clearance on the side where you will mount and dismount.
Unpacking generates a lot of packaging material. Break down the cardboard and set aside plastic wrap immediately so it does not become a tripping hazard near your work area. Two of the heaviest components — the main frame and the folded base — are awkward to handle alone; if possible, have a second person help move the frame to your chosen spot before assembly, because moving a fully assembled bike across carpet can strain the folding hinge.
Finally, note that the folding hinge mechanism is the single most failure-prone part of these bikes. Never ride the bike unless the folding lock pin or latch is fully engaged. You will verify this during setup and before every ride.
Step-by-Step Instructions
Step 1: Attach the front and rear stabilizer bases
Place the main frame on the floor on top of the towel so it does not scratch. Identify the front and rear stabilizer bars — the horizontal tubes with capped ends and leveling feet. Slide each bar into its socket on the underside of the frame and secure it with the bolts provided, hand-tightening first, then firmly tightening each bolt with the included wrench. Rotate the leveling feet on the ends of the bars so they extend evenly.
Tip: Do not fully tighten one bolt before starting the others. Loosely fit all bolts on each bar first, then tighten them in sequence — this lets the bar seat squarely and prevents crooked attachment.
Check: Push the frame side to side; the stabilizer bars should not wobble or shift at the bolt joints. The bike should sit level with all four feet touching the floor.
Step 2: Attach the seat post and seat
Loosen the seat adjustment knob on the frame so the seat post slot is open. Insert the seat post into the frame tube with the seat facing forward toward the handlebars, matching the angle printed in the manual. Push the post down to a middle height for now — you will fine-tune it later. Tighten the adjustment knob firmly. If your seat attaches separately from the post, set it on top, align the bolt holes under the seat pan, and secure it with the included bolts.
Tip: Note the minimum insertion line marked on the seat post. The line must remain inside the frame tube — never raise the seat above it, because over-extension is a common cause of post failure.
Check: Grip the seat and try to twist and rock it. There should be zero rotation and no side-to-side play.
Step 3: Attach the handlebar post and handlebars
Insert the handlebar post into the front frame socket and secure it with the adjustment knob or bolts, setting it at a mid-height position for now. If your model has folding handlebars, unfold them fully until the hinge clicks or the locking lever closes. Attach the handlebar crossbar if it ships separately, bolting it through the pre-drilled holes. Route the hand-pulse wires or resistance knob cable through or along the post exactly as the manual shows before tightening everything down.
Tip: Pinched cables are the number-one cause of a dead console. Leave slight slack in any wire running up the handlebar post and confirm it is not trapped under a bolt collar.
Check: The handlebars resist firm twisting, and any cables move freely without pulling taut when you raise or lower the post.
Step 4: Attach the pedals
Identify the left and right pedals — they are marked with an L and R stamped on the spindle ends, and they thread in opposite directions. Insert the right pedal into the right crank arm by turning it clockwise; insert the left pedal into the left crank arm by turning it counter-clockwise. Hand-tighten each one, then give a final firm turn with the wrench. Attach the strap or cage, if included, by clipping or buckling it onto the outer edge of each pedal.
Tip: This is the most common assembly error. Forcing the left pedal in clockwise, or the right pedal in counter-clockwise, strips the crank threads within seconds. If a pedal resists threading by hand, stop, back it out, and confirm which side it belongs to.
Check: Both pedals are tight, spin freely on their bearings, and neither wobbles on the crank arm. Each pedal faces forward with the strap opening toward your toes.
Step 5: Install batteries and test the console
Locate the battery compartment on the back or underside of the console and open it with a screwdriver if needed. Insert the batteries matching the polarity diagram — the display should light up immediately. Pedal the bike by hand for a few rotations and confirm the console registers speed or RPM. Turn the tension knob or magnetic resistance dial through its full range while slowly rotating the pedals to confirm resistance changes smoothly.
Check: The display shows numbers when you pedal and goes blank or sleeps when you stop, and the resistance changes noticeably from the lowest to highest setting.
Step 6: Adjust the bike to fit your body
Stand next to the bike and raise or lower the seat so the top of the seat sits roughly level with your hip bone. Sit on the bike and place your heel on a pedal at its lowest position, checking that your leg is nearly straight without locking the knee. Place the ball of your foot on the pedal and confirm you have a slight knee bend at the bottom of the stroke. Adjust the handlebar post height so you can reach the grips with a comfortable forward lean and relaxed shoulders. Tighten all adjustment knobs firmly before riding.
Tip: Re-check fit after your first few rides. Numbness in the hands usually means the handlebars are too low or too far away; knee pain at the front of the knee usually means the seat is too low.
Check: At the bottom of each pedal stroke, your knee is bent about 15 to 20 degrees with the ball of your foot on the pedal, and you can grip the handlebars without stretching or hunching.
Step 7: Verify the folding mechanism and ride
Confirm the folding lock is engaged before your first ride: locate the hinge pin, spring pin, or lever at the frame’s fold point, and verify it is fully seated with no gap at the hinge line. Check every bolt you installed one final time. Set the resistance to a low level, sit down, place your feet in the pedal straps, and pedal at an easy pace for 5 to 10 minutes. Keep your back upright, shoulders relaxed, and knees tracking straight forward over the pedals.
Tip: For your first week, keep sessions to 10 to 20 minutes at low resistance. Add 5 minutes per session as your legs adapt, rather than starting with long rides.
Check: The bike feels stable with no rocking, creaking, or frame movement at the hinge, and you finish the ride without knee, hip, or wrist discomfort.
Step 8: Fold the bike for storage
Dismount and let the pedals come to rest. Slide the seat down or remove it if your model requires it for clearance. Release the folding lock pin or lever at the frame hinge, then pull the release handle or lift the rear of the bike so the frame folds in half — typically the seat half folds down toward the pedals. Let the bike rest on its transport wheels or its folded base. Roll it to your storage spot against a wall. Fold the handlebars flat as well if your model has folding handlebars.
Tip: Never carry the folded bike by the seat or handlebar post — lift by the main frame or roll it on the transport wheels, since the adjustment knobs are not load-bearing handles.
Check: The folded bike stands or rests on its own without support, the folding pin is re-engaged or stowed per the manual, and the unit fits your planned storage footprint.
Common Mistakes to Avoid
- Cross-threading or forcing pedals on the wrong side — Thread both pedals by hand first. The right pedal tightens clockwise; the left tightens counter-clockwise. If it does not start smoothly, stop and re-check the L and R markings.
- Riding with the folding hinge pin not fully engaged — Make a habit of pressing and visually checking the fold lock before every ride. If the pin has a pull ring, pull it out slightly and release it so it snaps through the full hole.
- Setting the seat too low, causing knee strain — Use the hip-bone height starting point and the heel test described in the fit step, then fine-tune based on how your knees feel during the first week of riding.
- Placing the bike on thick carpet, causing rocking and hinge wear — Put a plywood board or rubber equipment mat under the bike on any soft surface, and re-tighten the leveling feet until the bike passes a side-to-side shake test.
Troubleshooting
Problem: Console does not turn on
Solution: Open the battery compartment and check polarity first. Then trace any wire running from the console down the handlebar post and confirm it is fully plugged in at both connector points — these connections often loosen in shipping. Replace with fresh batteries before assuming a fault.
Problem: Pedals or crank feel gritty, or there is a clicking sound
Solution: Confirm both pedals are fully tightened — a loose pedal clicks on every rotation. If the crank arm itself wobbles, stop riding and tighten the crank bolt per your manual. Persistent grittiness in the wheel usually means the drive belt shifted during shipping; re-seat it following the manual’s belt access panel instructions.
Problem: Bike rocks or wobbles during use
Solution: Turn the four leveling feet until all contact the floor evenly, then perform the shake test. On carpet, add a rigid mat. If rocking continues, re-tighten the stabilizer bar bolts — they can settle after the first few rides and need one additional tightening.
Problem: The bike will not fold or unfolds on its own
Solution: Check whether the seat or handlebars are blocking the fold path — lower the seat post fully first. If the fold pin will not seat, the frame halves may be slightly misaligned: rock the folded section gently while pressing the pin. A frame that unfolds on its own means the pin or latch spring is worn or not engaged; stop using the bike and contact the manufacturer for a replacement pin.
What Success Looks Like
Your setup is complete when all of the following are true: every bolt from the parts list is installed and tight; the bike passes a firm side-to-side shake test with no rocking; the folding pin is fully engaged with no visible gap at the hinge; the console displays data when you pedal; resistance changes smoothly across the full dial range; and a 10-minute test ride at low resistance feels stable and comfortable with no knee, hip, or wrist pain. You should also be able to fold the bike and roll it to storage in under a minute, with it resting stably on its wheels or folded base. Finally, mark your calendar for a bolt re-check after your first week of riding — new bikes almost always need one round of re-tightening as parts settle.
Next Steps
Build your routine gradually: ride 3 to 4 days per week at low resistance for the first two weeks, adding 5 minutes per session as it feels easier, then begin increasing resistance rather than speed to build strength. Wipe the frame and seat down after each ride to prevent sweat corrosion, which is the main cause of premature rust on folding bikes. Every month, re-tighten the seat and handlebar knobs, pedal spindles, and stabilizer bolts, and check the fold pin for wear. If you plan to keep the bike under a bed or in a closet, let it air-dry fully before storing to avoid moisture buildup on the frame. If any component develops play that re-tightening does not fix, contact the manufacturer while the warranty is active rather than continuing to ride on a loose part.
Frequently Asked Questions
How much floor space does a compact folding exercise bike need?
Plan for a use footprint of about 2 feet by 4 feet, plus 2 feet of clearance on one side for mounting. When folded, most models compress to roughly 18 by 18 inches of floor space and stand 40 to 55 inches tall depending on the design.
Can I use a folding exercise bike every day?
Yes, cycling is low-impact and suits daily use for most people. Start with shorter, easier sessions in week one, then build toward 20 to 30 minutes per session. Give the hardware a longevity boost by wiping it down daily and re-checking bolts monthly, since daily use loosens hardware faster.
How do I stop the seat from slipping down during rides?
Tighten the adjustment knob fully and confirm the seat post is below the minimum insertion line. If it still slips, the quick-release clamp may be worn — many manufacturers sell a replacement clamp, and a small shim cut from an aluminum can provides a temporary fix.
Is a folding bike as sturdy as a regular exercise bike?
A properly assembled folding bike within its weight limit is stable for normal riding. The hinge is the trade-off: it adds a point of wear, so keep the pin engaged, check it before every ride, and replace it at the first sign of looseness. Avoid standing on the pedals, which stresses the hinge more than seated riding.
Why does my bike squeak when I pedal?
Squeaks almost always come from pedal threads or the seat post. Remove the pedals, apply a thin coat of household grease to the threads, and reinstall them. If the squeak persists, apply a small amount of grease to the seat post where it enters the frame, and check the crank bolts for tightness.
Evergreen bestsellers Picks
bestsellers
As an affiliate, we earn on qualifying purchases.